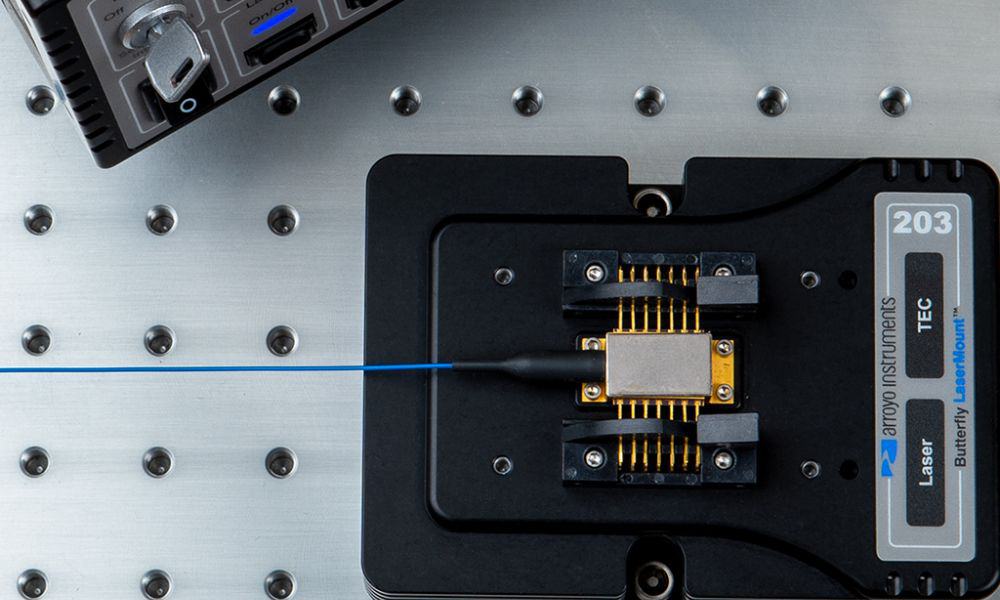
Technology has advanced to the point where lasers are commonplace in many industries, but their use is still incredibly precise. Multiple factors create optimal conditions for lasers, and one of those factors is mounting the laser diode. Here are the do’s and don’ts of laser diode mounting so your setup can be functional and you can easily achieve your desired results.
Select the Appropriate Mount
Organizations and businesses use lasers for various applications, as they are such versatile tools. With that said, these applications require different specialized mounts appropriate for the applications you seek. Many laser package types, such as butterfly or TO-can, have specifically designed mounts. Even non-standard package types can often have a mount built specifically for them.
Unpack Carefully
Before you open the package, you should leave it undisturbed for a few hours. This way, it can achieve thermal equilibrium and ensure cold or heat shock doesn’t negatively affect the diodes. On top of this, you should use proper tools for handling these diodes. For example, use clean gloves and tweezers; additionally, ensure that the surroundings are grounded, as electrostatic discharges (ESD) can easily damage the diode.
If working with unpackaged (exposed) laser diodes, such as C-mounts or laser chips, be extremely cautious of the laser chip and any wire bonds, as they can be easily damaged by even brief contact to the laser facet or wire bonds. The environment and workspace should also be free of airborne contaminants such as dust or other particulates.
Make Sure It’s Flat
Flatness of the mounting plate is very critical, particularly for fiber-coupled lasers. A non-flat surface will cause the laser package to bend slightly when screwed down, which can have significant—and potentially permanent—negative impacts on coupling of the light into the fiber. A non-flat surface also creates poor thermal contact, as the bottom of the laser will be inconsistently in contact with the mounting plate.
Use the Right Hardware
The mount should have a screw hole pattern that matches the device being mounted. While perhaps an obvious thing, make sure to use the correct sized screws (and washers, if called for) for the device. Using undersized screws can lead to poor compression of the device to the cold plate. Oversized screws, even if they fit, can interfere with electrical or mechanical aspects of the device. Also, make sure to use the correct length screw. Too long of a screw might penetrate a Peltier cooler module located below the mounting plate, while too short of a screw could lead to tearing out of threads due to poor engagement.
To Grease or Not To Grease
The question of grease is typically related to power levels: the higher the power, the more likely you’ll want to use grease. Grease improves the thermal contact of the laser to the mount, thereby lowering the temperature of the laser. Sometimes the manufacturer recommends grease, but in the absence of specific guidance, here are some guidelines:
- Low power devices (under one to two watts) typically do not need grease.
- Devices with large contact areas (such as HHLs) can operate at higher powers before requiring grease.
- Do not overdo it. Apply a very thin layer of grease—a razorblade works well for this.
- Always use non-silicone grease—silicone grease tends to creep and will leave an oily film on your device and mount.
- Never use grease with unpackaged or exposed lasers such as C-mounts or laser chips—risk of contamination, and therefore damage, of the laser is exceptionally high
Tighten Just Right
It is important not to over-tighten the screws for two reasons. Firstly, you may damage the thread in the mount. Secondly, you may warp the laser package. Some manufacturers will provide torque specifications for their devices, but if that information is unavailable, tighten until the screw stops turning and add an extra twist to get it snug.
You can also contact the mount or laser manufacturer for recommended torque settings. Tighten the screws in a crisscross pattern (like tightening lug nuts on a car tire) to ensure equal force across the device.
Making the Electrical Connection
Making the electrical connection to the laser is the last step in mounting the diode. It is important to ensure that connection to the laser uses an appropriated sized connector and/or wire to carry the current to the laser pins. The connection must be robust and secure, as poor connections can lead to problems with, and possibly even damage to, the laser. Many mounts provide specialized connectors for this purpose, ensuring an easy-to-use, high-quality, solderless electrical connection to the laser. Contact the mount manufacturer if there is any question regarding the compatibility of the mount’s connector with your diode.
These were the do’s and don’ts of mounting a laser diode; you’ll want to find the right laser mount as it will greatly simply your setup experience. At Arroyo Instruments, we can help you find the correct laser diode mounts to best fit your application needs.